Home > Product > DCS control system > KJ3242X1-BK1 12P4711X052 Control module
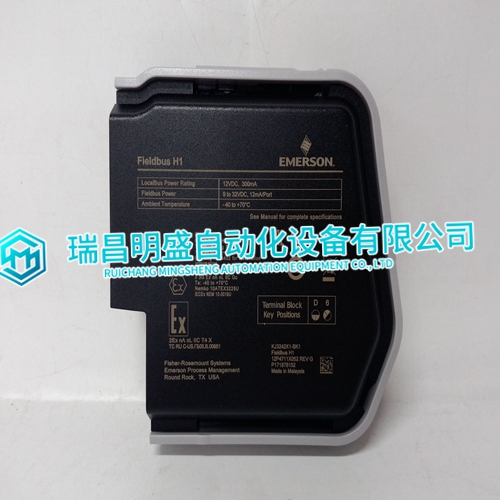

KJ3242X1-BK1 12P4711X052 Control module
- Product ID: KJ3242X1-BK1 12P4711X052
- Brand: EMERSON
- Place of origin: The United States
- Goods status: new/used
- Delivery date: stock
- The quality assurance period: 365 days
- Phone/WhatsApp/WeChat:+86 15270269218
- Email:stodcdcs@gmail.com
- Tags:KJ3242X1-BK1 12P4711X052Control module
- Get the latest price:Click to consult
The main products
Spare parts spare parts, the DCS control system of PLC system and the robot system spare parts,Brand advantage: Allen Bradley, BentlyNevada, ABB, Emerson Ovation, Honeywell DCS, Rockwell ICS Triplex, FOXBORO, Schneider PLC, GE Fanuc, Motorola, HIMA, TRICONEX, Prosoft etc. Various kinds of imported industrial parts
Products are widely used in metallurgy, petroleum, glass, aluminum manufacturing, petrochemical industry, coal mine, papermaking, printing, textile printing and dyeing, machinery, electronics, automobile manufacturing, tobacco, plastics machinery, electric power, water conservancy, water treatment/environmental protection, municipal engineering, boiler heating, energy, power transmission and distribution and so on.
KJ3242X1-BK1 12P4711X052 Control module
The Throttling and CPU Throttling back hysteresis selections will only be shown if
“CPU Throttling Down Threshold” is enabled. The default is Disabled. The default for
CPU Throttling back hysteresis is 10C. The default for Throttling is 50%.The Boot priority is determined by the stack order, with the top having the highest
priority and the bottom the least. The order can be modified by highlighting a device
and, using the <+> or <-> keys, moving it to the desired order in the stack. A device
can be boot disabled by highlighting the particular device and pressing
Boot Menus
There are two methods of enabling the Managed PC Boot Agent. The first method is the First Boot menu. The second is the Boot menu from the Boot Agent Setup Utility. First Boot Menu Press F11 at the very beginning of the boot cycle, which will access the First Boot menu. Selecting “Managed PC Boot Agent (MBA)” to boot from the LAN in this screen applies to the current boot only, at the next reboot the VMIVME-7700 will revert back to the setting in the Boot menu.
Using the arrow keys, highlight Managed PC Boot Agent (MBA), and press the ENTER key to continue with the system boot. Boot Menu The second method of enabling the Argon BIOS option is to press the DEL key during system boot. This will access the BIOS Setup Utility. Advance to the Boot menu, and to the Boot Device Priority sub-menu. Use the arrow keys to highlight the Managed PC Boot Agent (MBA) option. Repeat entering <+> until the desired MBA is at the top of the list. Advance to the Exit menu, select “Exit Saving Changes” and press ENTER. When the system prompts for confirmation, press “Yes”. The computer will then restart the system boot-up
The VMIVME-7700 provides high-performance video
and Local Area Network (LAN) access by means of the video and LAN chipsets. The two LAN adapters can be configured to allow the VMIVME-7700 access to two separate, physical networks. Each LAN adapter is capable of running 10BaseT and 100BaseTx. To optimize performance of each of these PCI-based subsystems, install the driver software located on the distribution CD-ROM provided with the unit. Detailed instructions for installation of the drivers during the installation of Microsoft Windows XP Professional and Windows 2000 operating systems are provided in the following sections.
1. Follow normal Windows 2000 installation procedures. 2. After installing Windows 2000, and rebooting the computer, install the 69030 driver. Please read license.txt before continuing (win_drivers/win2k/license.txt). 3. Double click 'My Computer' icon. 4. Double click on the Control Panel folder. 5. Double click the System icon. 6. Click on Hardware tab. 7. Click the Device Manager button. 8. Under Other Devices right click on Video Controller and select Uninstall. 9. Click OK and close the Device Manager. 10. Click OK to close system properties with changes. 11. Close all windows, and reboot your system. 12. After Windows reboots, the Found New Hardware wizard will appear. Click Next.