Home > Product > Gas turbine system > 469-P5-HI-A20-E-H Relay module
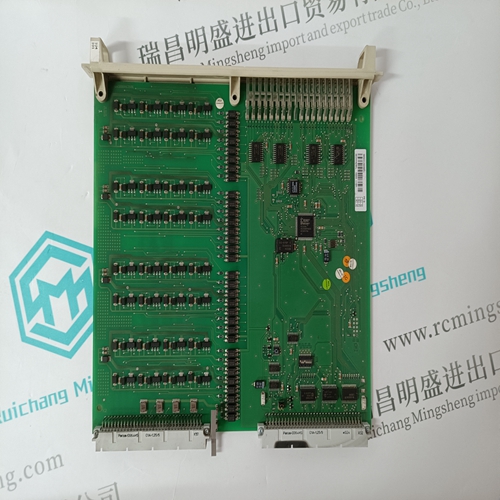
469-P5-HI-A20-E-H Relay module
- Product ID: 469-P5-HI-A20-E-H
- Brand: GE
- Place of origin: the United States
- Goods status: new/used
- Delivery date: stock
- The quality assurance period: 365 days
- Phone/WhatsApp/WeChat:+86 15270269218
- Email:stodcdcs@gmail.com
- Tags:469-P5-HI-A20-E-HRelay module
- Get the latest price:Click to consult
The main products
Spare parts spare parts, the DCS control system of PLC system and the robot system spare parts,
Brand advantage: Allen Bradley, BentlyNevada, ABB, Emerson Ovation, Honeywell DCS, Rockwell ICS Triplex, FOXBORO, Schneider PLC, GE Fanuc, Motorola, HIMA, TRICONEX, Prosoft etc. Various kinds of imported industrial parts
Products are widely used in metallurgy, petroleum, glass, aluminum manufacturing, petrochemical industry, coal mine, papermaking, printing, textile printing and dyeing, machinery, electronics, automobile manufacturing, tobacco, plastics machinery, electric power, water conservancy, water treatment/environmental protection, municipal engineering, boiler heating, energy, power transmission and distribution and so on.
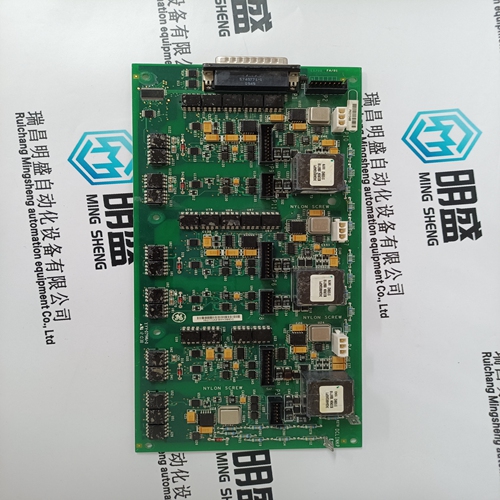
469-P5-HI-A20-E-H Relay module
• Bridge connectors transmit both communication signals and power supply between modules. • Removing bridge connectors will interrupt the transmission of both communication signals and power supply between the modules.Disconnecting Sockets Release all bridge connectors before removing the controller module and/or the terminal sockets and/or mixed I/O modules from the DIN rail. ► Press down at the same time both the gray side wings next to the red button and then pull the bridge connector out of the module.Dismounting Controller / Terminal Sockets / Mixed I/O Modules ► Insert a screwdriver into the latch on the underside of the module and lever the red latch 2–3 mm downwards. The module can then be swung away from the rail.Mounting Electronic Modules Note Electronic modules can be removed from or inserted into the sockets without switching off the power supply. The behavior of connected field devices must be taken into consideration. ► Make sure that terminal socket and electronic I/O module match, see Table 4 on page 6. ► Make sure that the red locking mechanism is in the open, i.e., left, position. ► Gently push the electronic module onto the terminal socket until snug.
Dismounting Electronic Modules
Note Electronic modules can be removed from or inserted into the sockets without switching off the power supply. The behavior of connected field devices must be taken into consideration. ► Open the red locking mechanism by sliding it to the left and then gently pull the electronic module out of the terminal socket.XS812 and XS812RO Manual Disconnect Modules are mounted on the terminal socket appropriate for the electronic module, see Table 4 on page 6. The electronic module is mounted onto the manual disconnect module.Mounting Manual Disconnect Modules ► Make sure that manual disconnect module, electronic module, and terminal socket match, see Table 4 on page 6. ► Make sure that the red locking mechanism is in the open, i.e., left, position. ► Gently push the manual disconnect module onto the terminal socket until snug. ► Lock the red locking mechanism by sliding it to the right.The XS814 Auxiliary Terminal Package can be mounted on any pluggable I/O module. The XS830 and XS831 Auxiliary Terminal Packages are suitable for mixed I/O modules, only. Specifically, they can be mounted on the top and/or bottom of the XF830A and on the bottom of the XFU830A. For reasons of mechanical stability, a maximum of two rows of Auxiliary Terminal Packages may be mounted together on any given I/O module. Mounting Auxiliary Terminal Packages ► Push the auxiliary terminal package onto the grooves of the corresponding terminal socket / the mixed I/O module.